SUMMER PARTY: RECIPE
The sun is out and hibernation time is over!
Time to throw your coolest shades on, get some sun-kissed skin, and oh you know it,
it's time to get the Summer Party started!
Between all the games and DANCING, food is our number one MUST-GET-IT-RIGHT for the party. So, want to know what we are "cooking" this summer?
Scroll down, check it out, and throw some aprons to get the party started!
DIY FLORAL ICE BUCKET
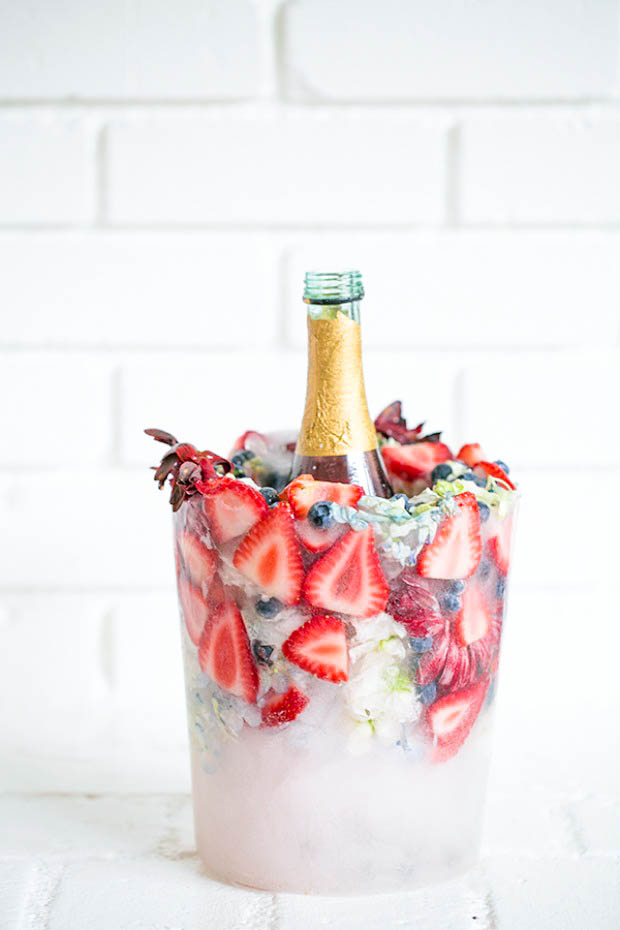

Drinks? Oh yeah, that's number one! Keeping your Champagne and wine chilled has never been prettier with these charming DIY floral ice buckets! They’re colorful, festive, and can be fully customized. Imagine kiwis, apples and flowers, it's like rainbow in your drinks! They look beautiful sitting on a table and are the perfect refreshments for summer time. We love how they came out! See the how-to below. Cheers to DIY ice buckets!!
Supplies:
2 different sized, inexpensive plastic buckets (a large one and one to fit inside that is also large enough for a champagne bottle), flowers, fruit, rocks.
Directions:
1. Fill the large bucket with 2-3 inches water and freeze.
2. Place the smaller bucket inside and fill it with rocks so it’s weighted. Otherwise it will float when then the water is poured in.
3. Fill the circle with water and tuck the flowers and fruit in tight, so they don’t float to the top when frozen. You can also do this in two steps, filling half then freezing and then doing the second half. This will insure the flowers will be dispersed throughout the bucket when frozen.
4. Freeze the bucket overnight.
5. To remove the ice bucket, remove the rocks from the center, then fill that container with warm water and let it sit. Pour it out and then run water around the outside of the bucket. It will eventually loosen and slide out.
*We highly recommend using plastic and galvanized buckets as glass can break.
Also, when serving, place it on a tray or container with a little ledge to catch the water. You can also fold a washcloth and set it underneath to absorb some of the water.
Enjoy and stay charming!
Source: Sugar and Charm
Italian Flatbread (Piadina) with Fontina and Prosciutto
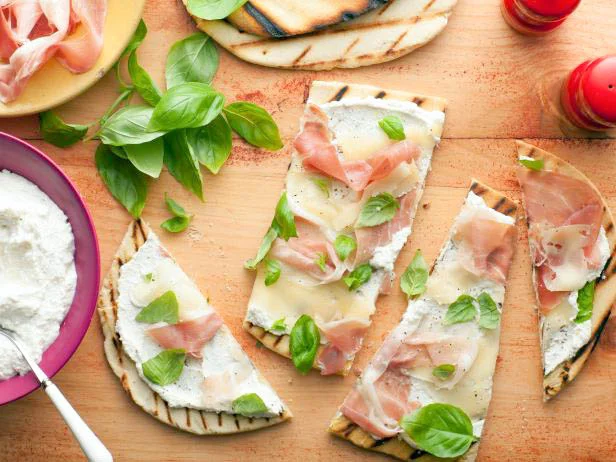
And you know, everyone loves some good-old-simple Italian food. As it's summer party, let's keep it simple - finger food at it's best!
Ingredients
- 3 1/2 cups all-purpose flour, plus extra for dusting
- 1/2 teaspoon baking soda
- 1 teaspoon fine sea salt, plus extra for seasoning
- 1 stick butter, cut into 1/2-inch pieces, at room temperature
- 2 tablespoons extra-virgin olive oil
- 1 pound whole milk ricotta cheese
- 2 teaspoons lemon zest (from about 2 small lemons)
- Freshly ground black pepper
- 6 ounces fontina cheese, shredded (about 2 cups)
- 4 ounces prosciutto, thinly sliced-
- 1 cup chopped fresh basil
Directions
Combine the flour, baking soda, and 1 teaspoon of salt in the bowl of an upright mixer fitted with a dough hook attachment. Add the butter and mix on low speed until incorporated, about 2 minutes. With the machine running, slowly add 10 to 12 tablespoons water until the mixture forms a dough around the hook. Transfer the dough to a lightly floured work surface and knead for 5 minutes until smooth. Cut the dough into 4 equal pieces. Form into disk shapes and wrap in plastic wrap. Refrigerate for 30 minutes.
Place a grill pan over medium-high heat or preheat a gas or charcoal grill. On a lightly floured work surface, roll out each piece of dough into an 8 to 10-inch circle, about 1/8-inch thick. Brush each circle with the extra-virgin olive oil and grill for 4 minutes each side. Remove the piadina from the grill to cool slightly. Combine the ricotta cheese and lemon zest in a small bowl. Season with salt and pepper. Spread each piadina with 1/2 cup of the ricotta mixture. Sprinkle the fontina cheese evenly over the ricotta cheese. Arrange 2 prosciutto slices on top of the cheeses. Cut each piadina into 8 wedges and transfer to a serving platter. Garnish with the chopped basil.
Source: Food Network - Recipe courtesy of Giada De Laurentiis, 2008
The Firecracker – Watermelon, Lime and Cucumber Cocktail
What's a party without a cocktail? Since it's summer, we're kicking it off with our favourite watermelon to turn down the heat!
Ingredients
- 4 oz Prairie Cucumber Vodka
- 4 (1-inch) cubes of seedless watermelon
- 2 limes, diced
- 2 oz simple syrup (Boil 1/4 cup water and sugar just until sugar dissolves. Add 1/4 cup ice to cool - refrigerate leftovers)
- To Garnish:
- Lime Rim (equal amounts salt and sugar combined with some fresh grated lime)
- 2 Watermelon Slices
- 2 cucumber slices
- 2 small mint sprigs
Instructions
- Combine vodka, watermelon and lime in a cocktail shaker. Muddle all ingredients well. Add simple syrup, fill with ice, cover and shake until ice cold.
- Rim the glasses with a cut lime and dip in the lime rim mixture.
- Fill the glasses with ice and pour the ingredients from the shaker into the glasses.
- Garnish with a watermelon slice, a cucumber slice and a mint sprig.
Source: Creative Culinary
Blackened Shrimp Avocado Cucumber Bites
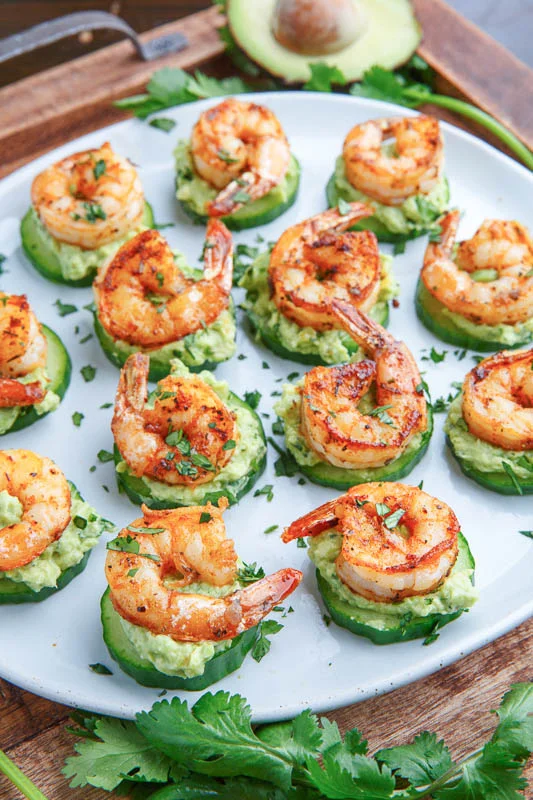
Shrimp, avocado and cucumber? Yes please!
Wouldn't want my belly sticking out from the bikini ;)
Light and tasty blackened creole seasoned shrimp on crisp and juicy cucumber slices with cool and creamy avocado and flavour packed remoulade sauce!
Ingredients
- FOR THE SHRIMP AND CUCUMBER BITES:
- 1 tablespoon oil
- 1 tablespoon creole seasoning
- 1 pound shrimp, peeled and deviened
- 1 cucumber, sliced
- 1/4 cup remoulade sauce (optional)
- FOR THE AVOCADO SAUCE:
- 1 avocado, mashed
- 1 green onion, thinly sliced or chopped
- 2 tablespoons cilantro and/or parsley, chopped
- 1 tablespoon lemon juice
- salt and cayenne to taste
Directions
FOR THE SHRIMP AND CUCUMBER BITES:
- Toss the shrimp in the oil and the seasoning and cook in a preheated (medium-high heat) heavy bottomed pan/skillet until slightly blackened, about 2-3 minutes per side.
- Assemble the bites with cucumber slices, topped with avocado sauce, shrimp and remoulade sauce.
- FOR THE AVOCADO SAUCE:
- Mix everything and enjoy!
Option: Use your favourite guacamole instead of this avocado sauce.
Source: Closet Cooking
Pink Lemonade Jello Shots

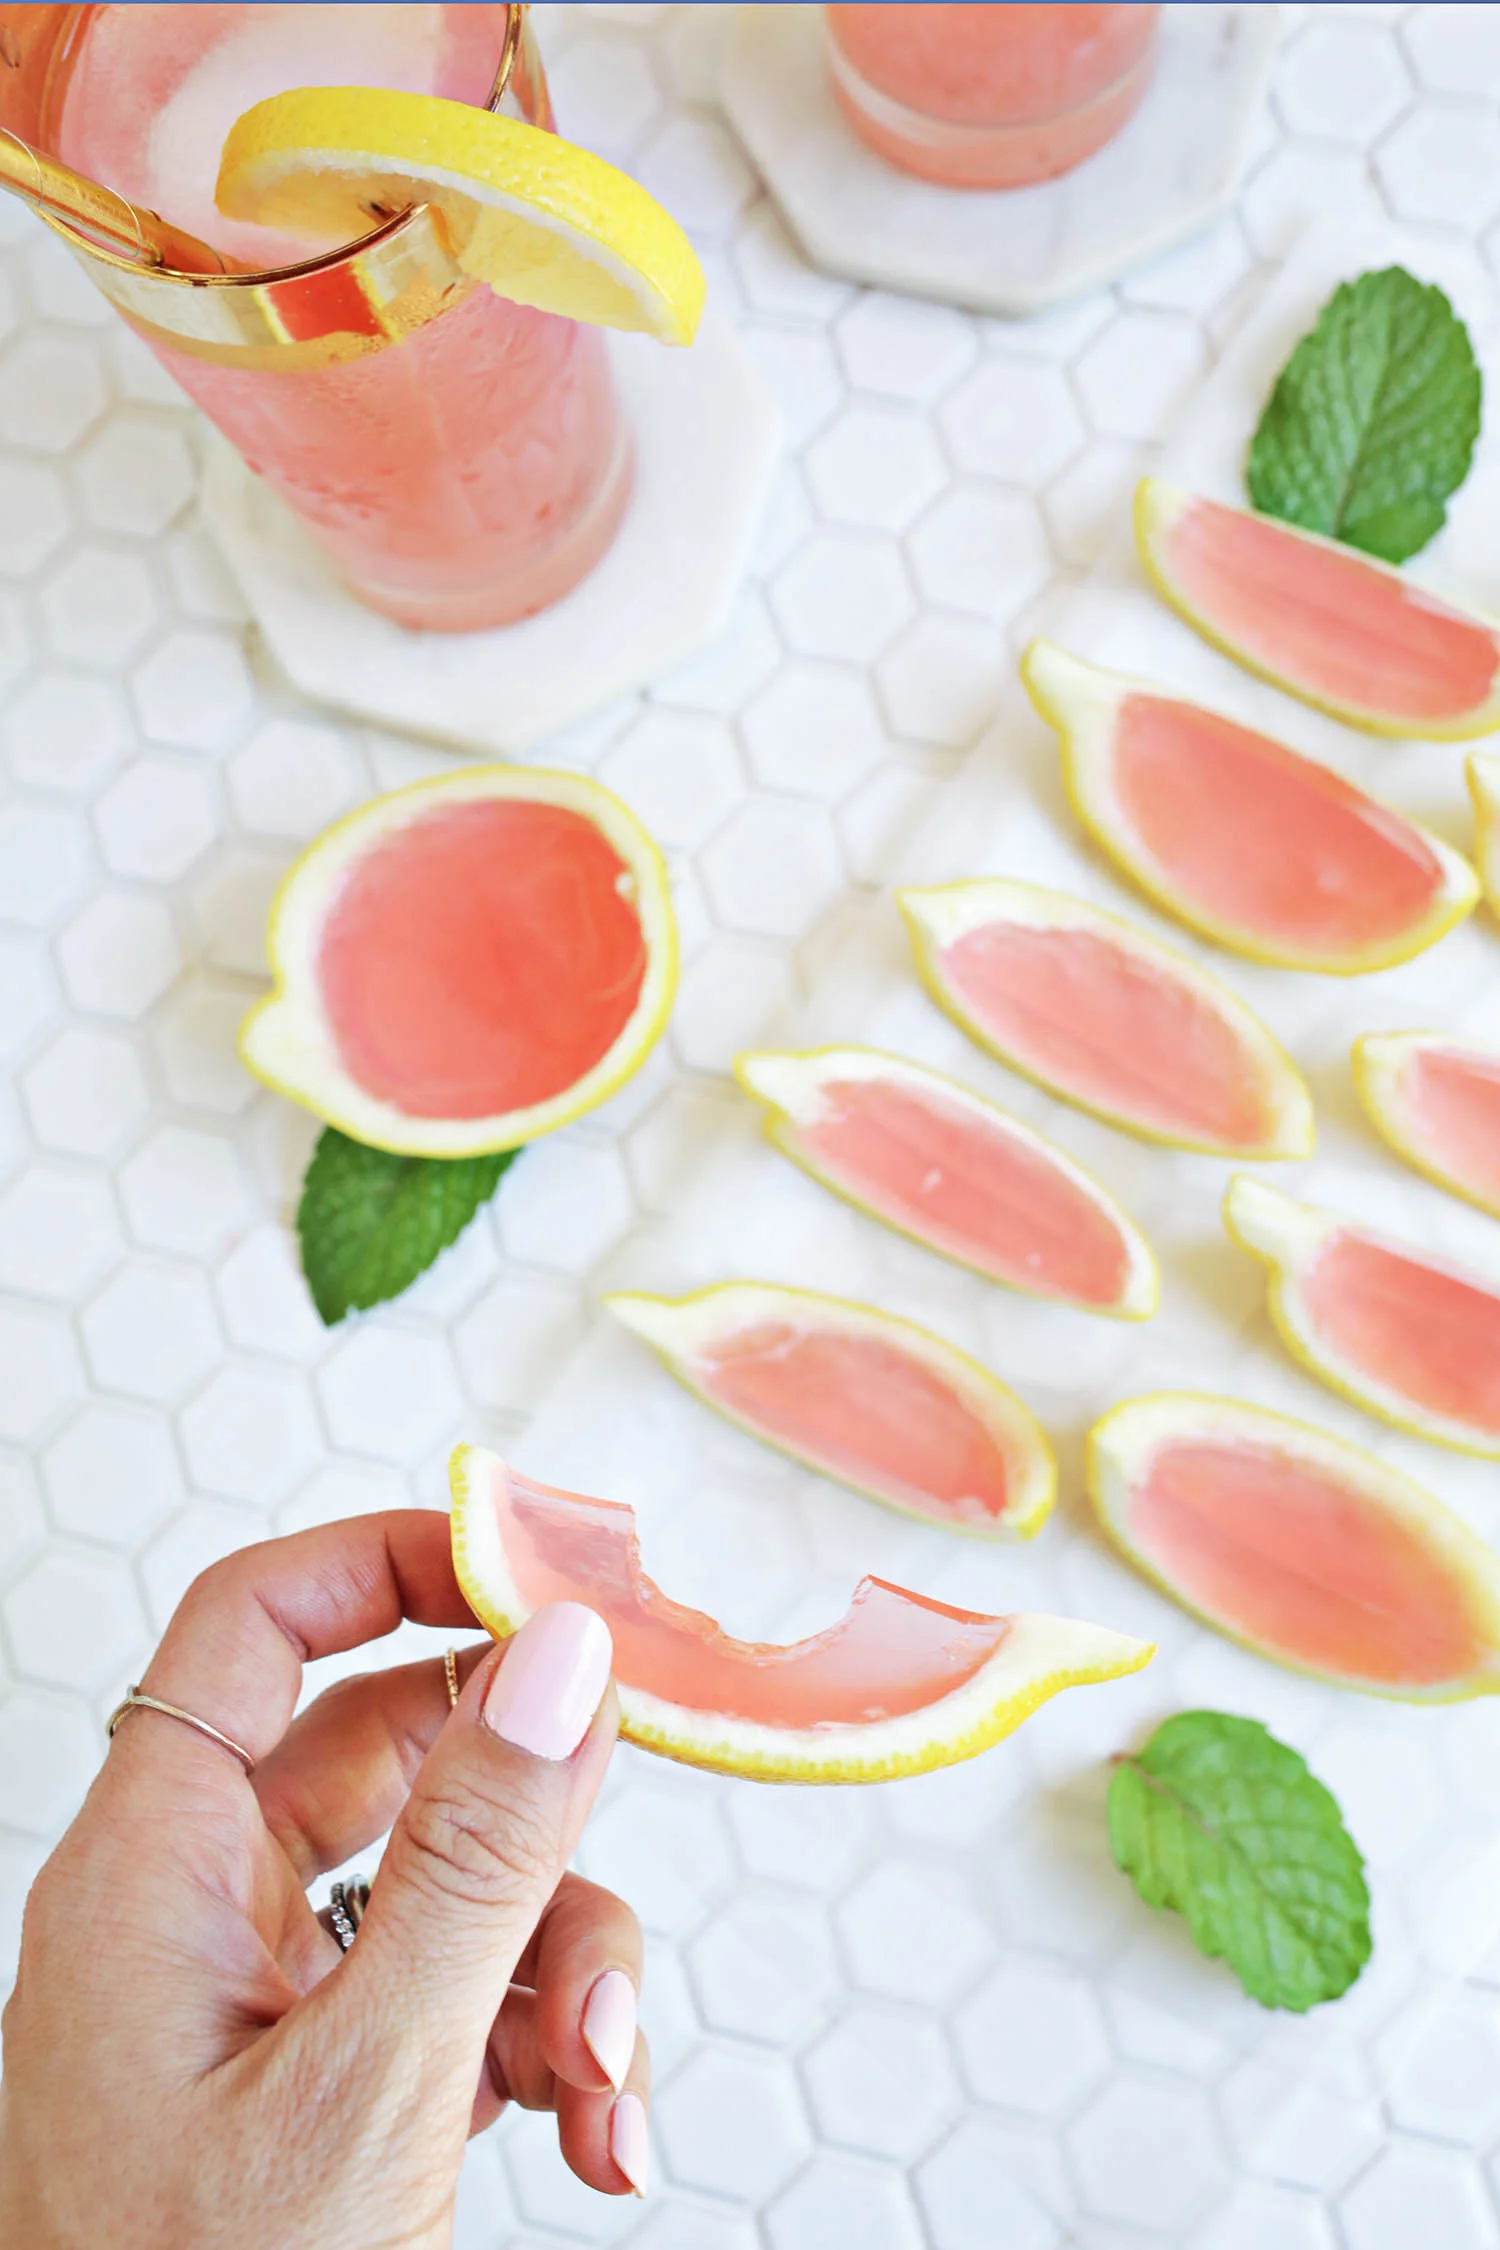
Adding another colorful things to the list! Pretty isn't? Bored with the usual jello shots? Well, this one is surely for summer! The freshness from the lemonade will freshen you up!
Ingredients
- 2 packets of unflavored gelatin
- 1 cup pink lemonade
- 1/2 cup regular vodka
- 1/2 cup lemon vodka or Lemon Eddy
- 5 lemons
Directions
Cut your lemons in half and use a spoon (a serrated grapefruit spoon works great if you have one) to scoop out the insides as much as you can.
Heat the lemonade in a pan over medium heat and stir in the packets of gelatin slowly until they dissolve. Add the lemonade and gelatin mixture to a bowl and pour in your vodka liquids. Stir until combined.
Transfer the liquid into a pourable container and place your lemon halves into a muffin tin to keep them upright. Pour in the liquid until each half is full and refrigerate for 4 hours or until set.
Remove the tin once the lemons have set and slice into slices right before serving. Enjoy!
Source: A Beautiful Mess
Champagne Popsicles
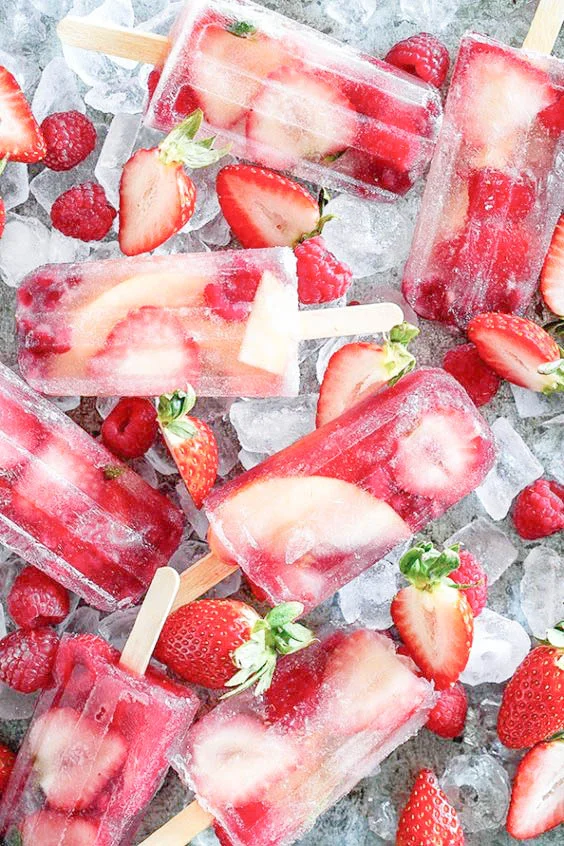
Does it get any more satisfying than champagne and fruit-filled ice pops?
Nope, didn't think so! And they're super easy to make. It's basically champagne and your favorite fruits.
In this recipe, mixed berries, apples and pomegranate arils were used, but change it up with whatever you please. Bakers Royale even leaks how to get a gorgeous Instagram shot: Use the ice as a surface for the pops.
Source: The Fashion Spot
Wait...! We also want to share pretty serving-ware you'd want to have in your party!
Slide - Unique serving board with unlimited serving options!
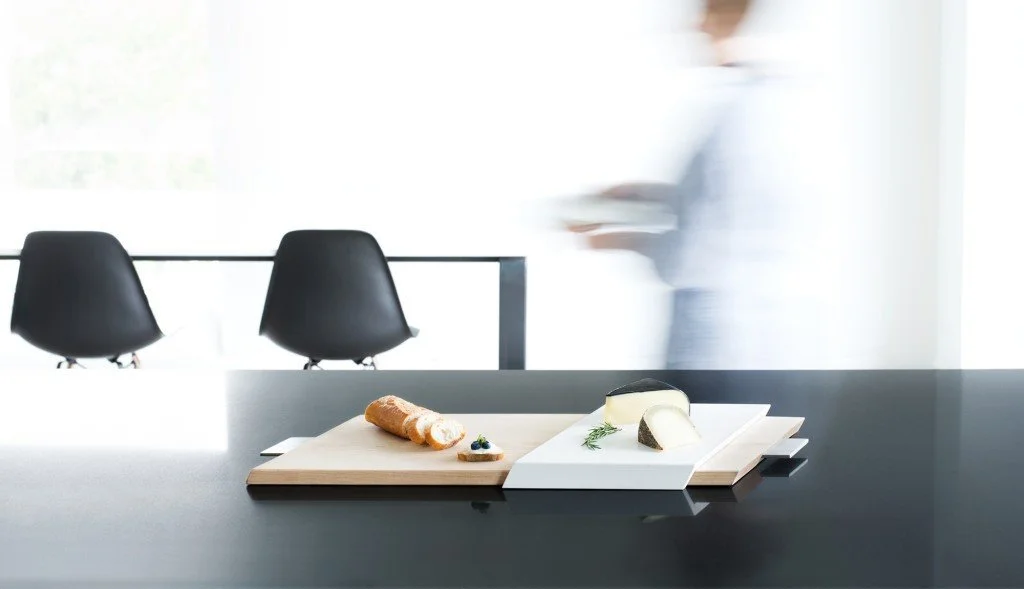
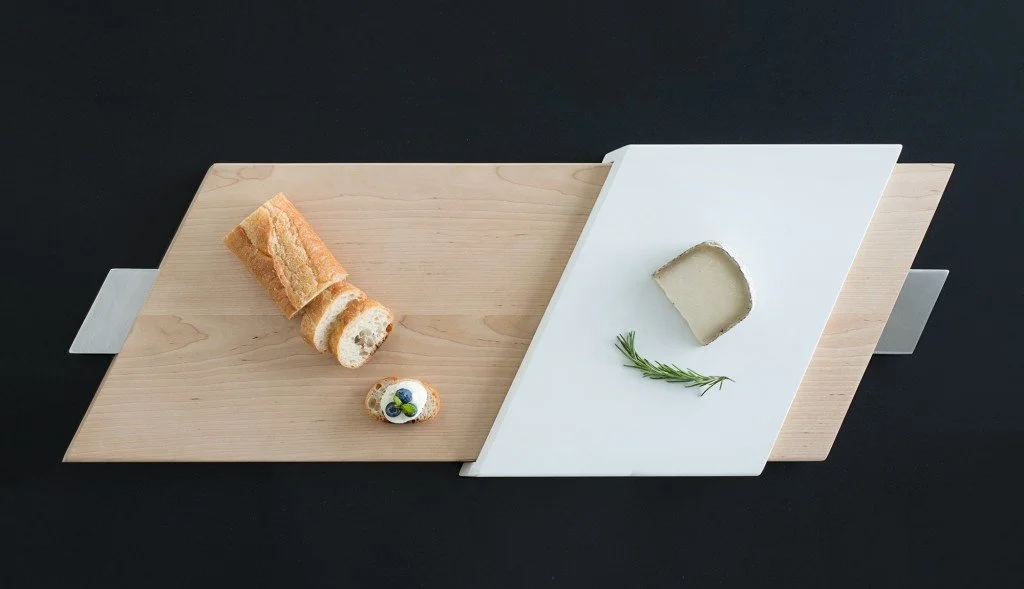
Source: FINELL
Brass Inlay Cheese Board - It's a cheese board, we know, but it's too pretty for just a cheese board! Finger foods fit there too!
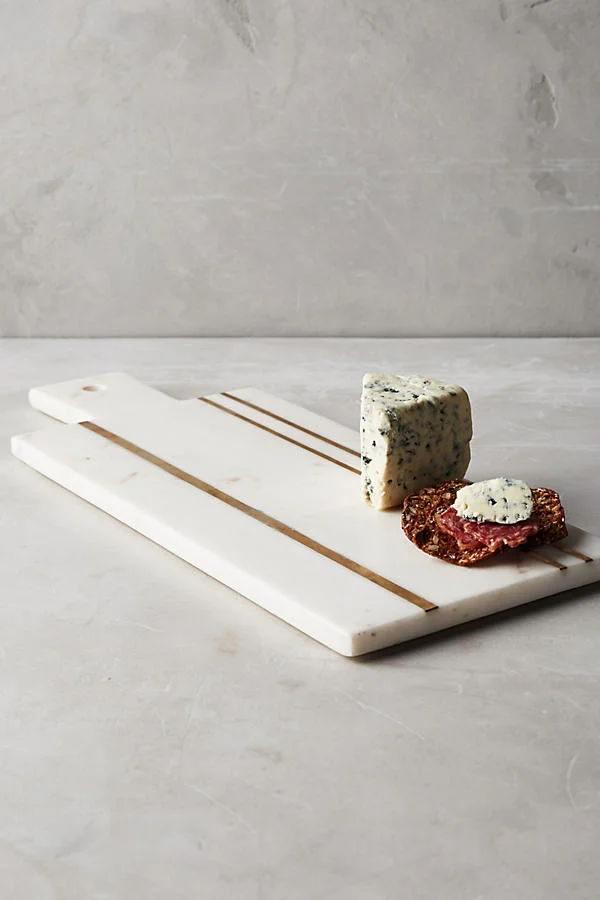
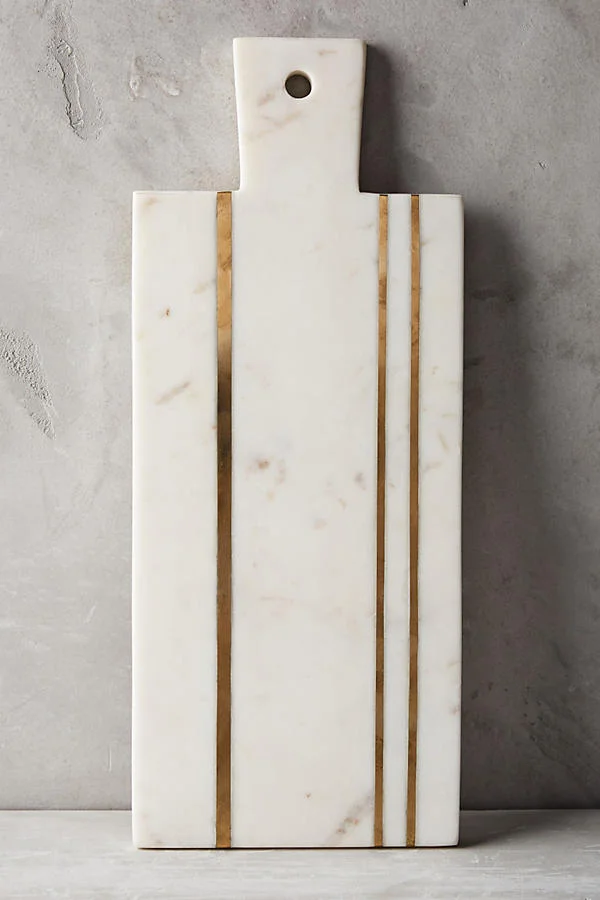
Source: Anthropologie
Gilded Rim Flute - Good-looking glass for the cocktails!
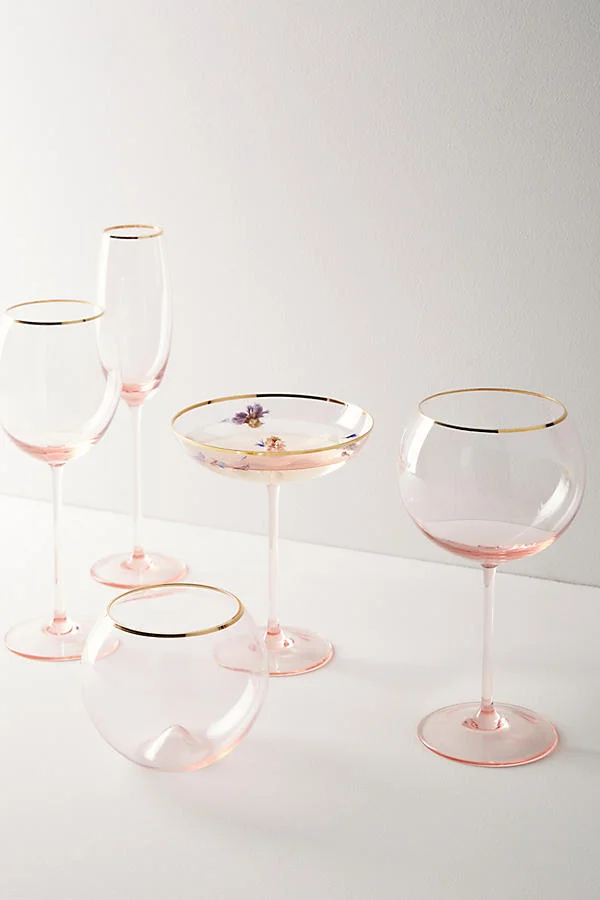
Source: Anthropologie
Zoku Mod Pops Ice Pop Mold - This isn't a serve ware but of course it's for the popsicles! Get 'em ice ready...!
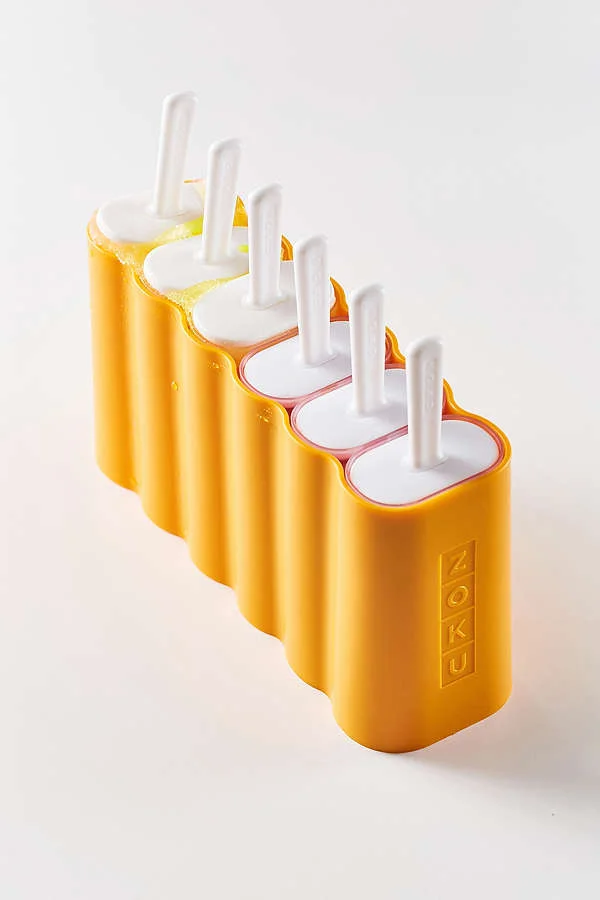
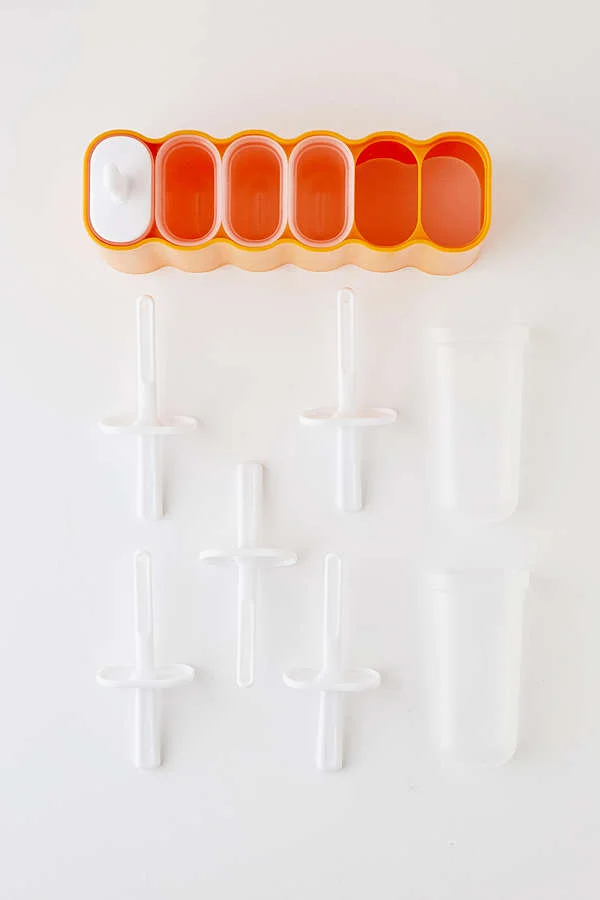
Source: Urban Outfitters
.... and we are ready for summer!